
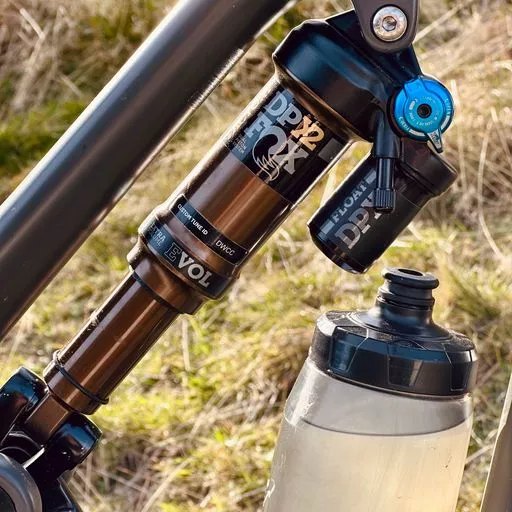
Rear Shock Pressure MTB: Terrain Setup Tips
Quick answer: Rear-shock pressure is the starting point, not a terrain-specific magic number. Begin with the shock and frame manufacturer’s baseline, verify SAG in your riding position, then use one controlled trail test to adjust support, grip and rebound for the terrain in front of you.
Build a reliable rear-shock pressure baseline
Pressure controls the spring side of an air shock. It affects ride height, SAG and how much support the bike has before the damper settings become the main variable. The correct pressure depends on the shock model, frame leverage, rider weight, equipment and the manufacturer’s recommended range.
- Start with the exact pressure or spring guidance for your shock and frame.
- Set tire pressure before evaluating suspension support; tires change the first impact and available grip.
- Measure SAG in full riding equipment, with a neutral stance and the shock at the temperature you will ride in.
- Confirm rebound from a known baseline before changing compression.
- Record pressure, SAG, rebound, tire pressure and trail conditions.
Do not copy a PSI number from another bike without checking the shock model, frame leverage and SAG. A number that works on one bike can produce too little support or too much harshness on another.
Match the setup to the terrain
Rocky trails: protect tracking and control
On rocky terrain, the rear wheel needs to follow repeated impacts without feeling nervous or deflecting sideways. Confirm tire pressure, spring-side support and rebound first. If the bike feels harsh on sharp rocks, test a small reduction in compression damping only after the baseline is correct. If it uses too much travel or feels unsupported, investigate SAG and spring progression before adding random clicks.
Rooty trails: keep the rear wheel connected
Roots create fast, repeated changes in load. A rear shock that rebounds too quickly can feel bouncy or kick the bike forward; rebound that is too slow can pack down and lose ride height through a sequence. Use the same root section for testing and change rebound in one-click steps, returning to the baseline if traction or control gets worse.
Square-edge impacts: balance support and comfort
Square edges expose incorrect spring support, excessive damping and poor tire pressure quickly. Check whether the shock is reaching the end of its travel, whether the tire is transmitting the hit and whether the bike is recovering between impacts. Do not use high-speed compression as a substitute for correct pressure, SAG or a service check.
| What you feel | First checks | Controlled next step |
|---|---|---|
| Rear end feels harsh on sharp hits | Tire pressure, SAG, compression baseline | Test one small compression change on the same feature |
| Bike bounces or kicks after roots | Rebound baseline, tire pressure, SAG | Test slightly more rebound damping, one step at a time |
| Shock packs down in repeated bumps | Rebound too slow, starting ride height | Test slightly less rebound damping on the same section |
| Frequent bottom-out | SAG, spring progression, tire pressure, damage or service | Check the manufacturer’s setup and service guidance |
Test one change at a time
Choose one repeatable trail feature and keep body position, line and tire pressure as consistent as possible. Make one small adjustment, ride the same feature again and record whether grip, support or control improved. If the change does not help, return to the previous setting before testing another variable.
Use the correct MTB suspension setup order when the complete baseline is uncertain. If the symptom persists across settings, use the suspension troubleshooting guide instead of stacking more adjustments.
When pressure changes are not the answer
Persistent air loss, oil leakage, shaft or hardware play, unusual noise, damaged seals, sticky movement or inconsistent damping can indicate a service issue. Stop tuning and follow the manufacturer’s inspection or service guidance. A pressure change cannot safely repair a leaking or damaged shock.
For temperature-related changes, compare the bike at the temperature you will actually ride in and use the cold-weather setup guide. After service, record the new baseline and use the maintenance tracker to keep the next check repeatable.
Rear-shock pressure FAQ
How much SAG should a rear shock have?
Use the frame and shock manufacturer’s recommendation for the exact bike. A broad percentage is only a starting point; verify the measurement in riding equipment and confirm that the bike has the intended support and ride height.
Should I change rear-shock pressure for rocky trails?
Not automatically. Start from the manufacturer baseline and verify SAG, tire pressure and rebound. Change pressure only when the spring-side baseline is wrong; use small, recorded adjustments rather than a terrain-based number copied from another bike.
Why does my rear shock feel harsh on roots?
Check tire pressure, SAG, rebound, compression and component condition. Rebound that is too fast can feel nervous, while rebound that is too slow can pack down. Test one change on the same root section and inspect the shock if the symptom persists.
Should I add air pressure to prevent bottom-out?
First check SAG, the manufacturer’s pressure range, air-spring progression, compression settings, tire pressure and service condition. More pressure can reduce available movement and change balance, so do not use it as a universal bottom-out fix.
How many clicks should I change at once?
Start with one small click or the smallest meaningful step for the adjuster. Ride the same feature, record the result and return to the previous setting if grip, comfort or control becomes worse.